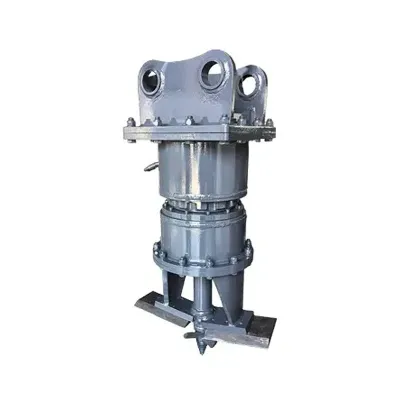
Putting an auger drive on a mini excavator is a pretty straightforward job—most operators can knock it out in 15 to 30 minutes with basic hand tools. The main steps are: pull the bucket off, bolt on the auger mounting bracket, hook up the hydraulic lines, attach the bit, and test it before you start drilling. This guide walks you through each stage, from pre-installation prep to the first test run, and covers a few common snags you might run into along the way. Always follow the manufacturer's specific instructions for your model, since details vary by drive and excavator configuration.
Pre-Installation Preparation
Before you dive in, gather your tools and make sure you have everything you need. You'll want the auger drive unit, the custom mounting bracket for your mini excavator, the boom pin and linkage pin, pin retainers or clips, hydraulic hoses with the right fittings, the auger bit itself, and basic hand tools—wrenches, a hammer or punch for driving pins, and a grease gun. Double-check that the mounting bracket matches your excavator's pin spacing, pin diameter, and stick width by comparing the bracket dimensions to the boom and linkage. If the bracket doesn't line up, don't force the pins—that means you've got the wrong bracket, and forcing it can damage the excavator boom or the auger drive.
Park the mini excavator on level, solid ground with the boom in a safe position. Set the bucket flat on the ground and relieve hydraulic pressure by cycling the auxiliary control lever with the engine off or at idle—this keeps hydraulic fluid from spraying when you disconnect lines. If your machine has a quick coupler, make sure it's in the release position and any safety locks are disengaged. Clean dirt and debris off the boom pin and linkage pin areas—contamination can cause premature wear and make pin installation a pain. If you can, get a helper to assist with aligning the bracket and driving pins; the auger drive is heavy and awkward to wrestle into position alone.
Removing the Bucket
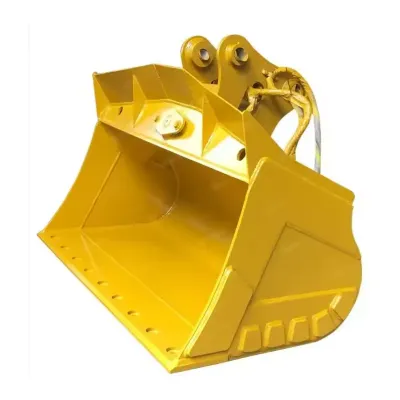
First things first: get the bucket off so you can mount the auger drive. Start by positioning the boom so the bucket rests flat on the ground with the linkage relaxed. That takes the tension off the bucket linkage pins and makes them easier to drive out. Remove the boom pin retainer—on different excavator models, that might be a spring clip, a bolted retainer, or a roll pin. Drive the boom pin out with a punch and hammer, pushing from the side opposite the retainer. Once that pin is out, do the same for the bucket linkage pin, which connects the bucket to the tilt linkage. With both pins removed, lift the boom slightly to separate the bucket from the boom and linkage, then set the bucket aside somewhere safe.
Now's a good time to inspect the boom pin and linkage pin for wear, scoring, or burrs. Worn or damaged pins should be replaced before you install the auger drive—they'll cause excessive play and accelerate wear on the auger bracket bushings. Clean the pins thoroughly and give them a light coat of grease before reinstalling. Also check the boom and linkage bushings for wear; replace any that show signs of ovaling or excessive play. Taking a few minutes to inspect and service the pins and bushings while the bucket is off gives you a solid mounting foundation for the auger drive and helps prevent premature wear of the attachment bracket.
Installing the Auger Mounting Bracket
With the bucket out of the way, position the auger drive and mounting bracket between the excavator boom and linkage. This is where a helper really pays off—the drive unit weighs anywhere from 55 to 135 kg depending on the model, and you need to hold it in alignment while you drive the pins in. Line up the bracket's boom hole with the boom pin holes, and the bracket's linkage hole with the tilt linkage pin holes. You may need to tweak the boom position slightly using the excavator controls to get everything lined up—the bracket has to sit square between the boom plates without binding.
Once everything's aligned, drive the boom pin through the boom and bracket, tapping it fully into position with a hammer or punch. Install the boom pin retainer and make sure it's secure. Then do the same with the linkage pin—insert it through the tilt linkage and bracket, drive it home, and install its retainer. After both pins are in, cycle the boom and tilt controls slowly through their full range to make sure the auger drive moves freely without binding or interference. The drive should pivot smoothly on the boom pin and respond to the tilt linkage without sticking. If it binds, check for pin misalignment, bracket interference with the boom structure, or debris in the pin bores. Don't run the auger if the mounting binds—that'll cause structural damage to the excavator or the drive unit.
Connecting Hydraulic Lines
This is the most critical step—wrong connections can damage the auger drive motor or the excavator's hydraulic system. The auger drive needs a supply line and a return line connected to the excavator's auxiliary circuit. Some models also require a case drain line for motor leakage, which has to go to a dedicated case drain port on the excavator, not the return line. Before you connect anything, make sure hydraulic pressure is relieved and the engine is off. Clean all fittings thoroughly before connecting—contamination is bad news for hydraulic systems.
Connect the supply line from the excavator's auxiliary pressure port to the auger drive motor inlet port (usually marked "IN" or with an arrow). Connect the return line from the motor outlet port ("OUT") to the excavator's auxiliary return port. If your drive needs a case drain, connect that line from the motor case drain port to the excavator's case drain port. Torque all connections to the manufacturer's spec with the right wrench size—loose fittings leak and can suck air into the system. Once everything's connected, check that the hoses are routed along the boom and stick without kinks, sharp bends, or interference with moving parts. Use hose clamps or ties to secure the lines to the boom if you need to, leaving enough slack for full boom and stick movement.
Attaching the Auger Bit
With the drive mounted and hydraulics connected, it's time to attach the auger bit. The bit connects to the drive output shaft—depending on the model, that could be a round shaft with a keyway and retaining pin, or a square shaft with a pin connection. Lower the drive to ground level and stand the auger bit upright next to the output shaft. Align the bit's connection hub with the shaft, making sure the keyway or square drive engages properly. insert the retaining pin through the output shaft and bit hub, and secure it with a clip or bolt. Give it a wiggle to confirm the bit is locked on tight and can't rotate independently of the drive shaft.
Before you fire it up, check the bit's condition. The cutting teeth at the leading edge should be sharp and intact—no missing or broken teeth. The spiral flights should be straight, with no bent sections, welded repairs, or excessive wear. If the bit is dull or damaged, swap it out before drilling—a bad bit makes poor holes, demands too much torque, and can damage the drive motor. For the first test run, use a standard earth bit in loose soil if you have one—that puts less stress on the drive and lets you verify everything's working before you tackle tougher ground. If you're using an extension shaft between the drive and the bit, install the extension first, then attach the bit to the extension, making sure all connections are pinned and secured.
Pre-Operation Checks and Test Run
Before you drill that first hole, run through a few checks to make sure everything's installed correctly and safe. Start the engine and let the hydraulic system warm up for a few minutes—especially important in cold weather. Engage the auxiliary hydraulic control briefly and watch the auger bit's rotation direction. It should turn clockwise when viewed from above—that's the standard drilling direction for right-hand spiral auger bits. If it turns counterclockwise, the supply and return lines are reversed and you need to swap them. Running it backward will unscrew the bit from the drive shaft and can damage the retaining pin.
Once rotation direction is confirmed, lower the spinning bit slowly into a patch of loose soil to test drilling performance. The bit should penetrate smoothly without excessive vibration, and the flights should carry soil up and out of the hole. If the bit struggles to penetrate, stalls, or the hydraulics start getting hot and noisy, the drive may be undersized for the bit or ground conditions, or hydraulic flow might be insufficient. Check for hydraulic leaks at all connections while the system is under pressure—tighten any fittings that show seepage. Make sure the excavator stays stable during drilling, with no tipping or excessive boom movement. After the test hole, raise the bit all the way out and inspect the bit and drive for any signs of damage, overheating, or abnormal wear.
Common Installation Issues and Solutions
A few common issues can pop up during installation, but most are easy to fix. If the mounting bracket won't line up with the boom and linkage, make sure you've got the right bracket for your excavator model and pin dimensions. Forcing pins into misaligned holes will cause galling and can permanently damage the bracket or boom. If the bracket is correct but alignment is slightly off, adjust the boom and stick position with the excavator controls to get everything square—the bracket has to sit properly between the boom plates.
If the auger bit spins the wrong way, swap the supply and return lines at the excavator auxiliary connections. This is a common mistake when the auxiliary ports aren't clearly labeled, and it's an easy fix. If the drive motor leaks oil from the case drain, make sure the case drain line is connected to a dedicated case drain port, not the return line—return line pressure can blow motor seals. If the drive feels weak or stalls easily, check that your auxiliary flow and pressure meet the drive manufacturer's specs, and verify the auxiliary relief valve is set correctly. If the bit wobbles badly during drilling, check the output shaft connection for wear, make sure the retaining pin is secure, and inspect the bit for bent flights or a damaged connection hub.
Removal and Storage
When you're done with the auger drive, removal is just the reverse of installation. Lower the bit to the ground, relieve hydraulic pressure by cycling the auxiliary control with the engine off, and disconnect the hydraulic lines—cap all open fittings immediately to keep dirt out and prevent fluid leaks. Remove the boom and linkage pins, and lift the drive and bracket clear of the boom. Store the auger drive in a clean, dry place, ideally with the output shaft capped to keep dirt and moisture out of the gear housing. If it's going into long-term storage, change the gear oil and apply rust inhibitor to exposed metal surfaces. Store auger bits upright or on a rack to keep the flights from bending, and keep all pins, clips, and hoses with the drive so you're not hunting for them next time.
Proper installation and setup of an auger drive on a mini excavator makes for safe, productive drilling and extends the life of both the drive and the machine. Follow these steps, double-check every connection, and run a thorough test before production drilling, and you'll avoid common pitfalls and get the most out of your auger attachment. The TGEC excavator hydraulic auger drive comes with custom mounting brackets for all major mini excavator brands and includes detailed installation instructions specific to your machine. For help picking the right drive model for your mini excavator, check out our auger selection guide.