Picking the right excavator mulcher is one of the bigger decisions a forestry contractor, land-clearing professional, or vegetation-management specialist will make. That attachment sets your production pace, your operating costs, the quality of the finish, and the range of material you can handle. Undersize the mulcher for your carrier, and you'll fight constant stalls and early wear. Oversize it, and you'll overload the hydraulics and compromise machine stability. Getting the match right between the attachment, your machine, and your work means looking closely at several interlocking factors.
This guide lays out a complete framework for choosing an excavator mulcher—covering design types, hydraulic fit, cutting ability, mounting styles, upkeep, and total cost over the life of the unit. Whether this is your first mulcher or you're stepping up to a bigger model for a new contract, working through these steps will help you spec an attachment that runs reliably and gives you a solid return on your investment.
Step 1: Know Your Vegetation and Your Job
Before you start comparing models, take a hard look at the vegetation you handle day in and day out, and the kinds of projects you take on. Forestry thinning, right-of-way maintenance, site prep, residential lot clearing, and invasive-species control all come with different vegetation mixes and production demands. The dominant material—whether standing timber, downed trees, stumps, surface brush, or grass—should steer you toward one design or the other.
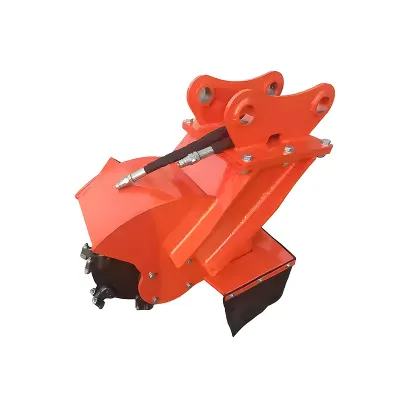
If standing trees are your main focus—trees you need to fell and mulch in one motion—a disc mulcher tends to be the more productive play, because its vertical spinning disc meets the trunk head-on and shears through wood at a perpendicular angle. If your sites give you a mix of fallen logs, stumps, surface brush, and the odd small tree, a drum mulcher offers broader versatility; its horizontal cylinder grinds whatever it contacts and leaves a finer mulch behind. For a deeper dive, see our detailed drum mulcher vs disc mulcher comparison.
Step 2: Check Your Excavator's Hydraulic Capacity
Hydraulic compatibility is the single most critical spec—get this wrong and nothing else matters. Every mulcher needs a specific continuous auxiliary flow (liters or gallons per minute), and your excavator has to deliver that flow steadily under sustained load. Too little flow and the rotor won't reach cutting speed—expect stalls, ragged edges, and accelerated tooth wear. Too much flow and you'll overspeed the motor, overheat the system, and risk seal and bearing damage.
To find your machine's hydraulic capability, dig into the operator's manual or call your dealer for the auxiliary circuit specs. You'll need three numbers: continuous flow rate, maximum operating pressure, and whether a case drain is present. Most mulchers require a case drain to protect the motor from backpressure—skip it, and you could blow seals and void the warranty. If your excavator lacks a case drain, you may need to have one installed by a qualified technician before running the mulcher.
As a rough guide, compact excavators in the 3-to-5-ton class typically put out 30 to 60 L/min; mid-size machines from 6 to 15 tons deliver 50 to 150 L/min; and larger excavators (15 to 30 tons) may supply 100 to 250 L/min or more. Always match the mulcher's required flow to your machine's continuous output—not peak—because mulchers run under load for extended stretches.
Step 3: Match the Mulcher to Your Excavator Operating Weight
Hydraulic flow isn't the only constraint—the mulcher also has to fit your excavator's weight class. Manufacturers publish a compatible weight range for each model, and straying outside that window invites trouble. A mulcher built for a 10-to-15-ton machine will be too heavy and too demanding for a 5-ton carrier, while a model sized for a 5-ton excavator will be underpowered and may suffer structural stress when mounted on a larger machine.
Attachment weight also affects your lift capacity and stability. A mulcher hanging at the end of the boom creates a long lever arm, and the dynamic forces from cutting add to the effective load. Check your excavator's rated lift capacity at the working reach you actually use, and make sure it exceeds the mulcher's weight plus a healthy margin for shock loads. If the attachment is too heavy, you'll see boom sag, reduced stability, and accelerated wear on swing bearings and boom joints.
Step 4: Assess Cutting Capacity and Production Rate
Cutting capacity means the largest stem diameter the mulcher can process effectively, and it's driven by attachment size, tooth design, hydraulic power, and operator skill. A larger mulcher with more teeth and higher flow will chew through bigger material faster, but it also needs a bigger excavator and burns more fuel. Look at the stem sizes you encounter most often, and pick a mulcher whose rated capacity comfortably exceeds that typical diameter—don't go with one that just barely handles your average material.
Production rate—measured in acres per day or tons per hour—depends on cutting width, tooth count, rotor speed, hydraulic power, and vegetation density. A wider cutting swath covers more ground per pass but adds weight and asks for more flow. For high-volume clearing in thick, uniform brush, a wide mulcher on a large excavator will give you the highest throughput. For selective thinning or precision work, a narrower, more nimble mulcher may be the better fit.
Step 5: Choose the Right Mounting Configuration
Excavator mulchers come with either pin-on mounting or quick-coupler compatibility. Pin-on gives you a rigid, direct connection that transfers hydraulic and mechanical force with maximum efficiency—it's the preferred setup for heavy forestry work where top cutting performance is non-negotiable. A quick coupler lets the operator swap attachments without leaving the cab, which is a big plus if your excavator also does digging, grading, or material handling on the same job.
If your machine has a quick coupler, make sure the mulcher's mounting bracket matches your specific coupler brand, pin spacing, and geometry. Not all couplers are interchangeable—using the wrong bracket can cause poor fit, excessive play, or even unsafe retention. Most mulcher manufacturers offer custom brackets for popular excavator brands and coupler systems, so be sure to give your machine details when you ask for a quote.
Step 6: Evaluate Maintenance Needs and Wear-Part Costs
Maintenance is a big slice of the total-cost-of-ownership pie for any mulching attachment. Daily chores include inspecting teeth for wear and damage, checking hydraulic hoses for leaks and abrasion, greasing bearings and pivot points, and clearing packed wood debris from the housing. Periodic work covers tooth replacement, bearing inspection, hydraulic oil and filter changes, and structural checks of the drum or disc for cracks and warping.
Wear-part costs vary by design. Fixed-tooth drum mulchers use bolt-on carbide cutters that can be replaced one at a time—that's cost-effective because you only swap out the worn ones, not entire assemblies. Disc mulchers have fewer teeth, but each tooth takes heavier impact loads, which can shorten life in rocky ground. When comparing mulchers, look beyond the purchase price: factor in the cost and availability of replacement teeth, how easy they are to change in the field, and expected service life under your conditions. A slightly more expensive attachment with cheaper wear parts and easier maintenance can end up costing less over its lifetime.
Step 7: Look at Total Cost of Ownership
Total cost of ownership includes purchase price, financing, fuel, maintenance and wear parts, labor, insurance, and resale value. When weighing different mulchers, don't just compare the sticker price—look at cost per hour or cost per acre over the expected life of the unit. A mulcher that costs 10 percent more upfront but delivers 20 percent higher production and 15 percent lower maintenance will give you a better ROI over several thousand hours.
Also think about versatility and fleet compatibility. A mulcher that works on multiple excavators in your fleet, or that can be swapped quickly with other attachments via a quick coupler, adds value by maximizing equipment utilization. If you plan to expand or upgrade your excavator fleet, choose a mulcher that can be remounted on a larger machine or that holds good trade-in value when you move up.
Step-by-Step Selection Framework
Run through these checkpoints in order. Start with the vegetation that makes up at least 70 percent of your typical work—that tells you whether a drum or disc design makes sense. Next, pull your excavator's auxiliary circuit specs (continuous flow, max pressure, case drain availability) and match them against the attachment's data sheet. Then check your lift capacity chart at the reach you normally use to confirm the attachment weight leaves enough margin for dynamic loads. After that, compare cutting capacity against the stem sizes you see most often—not the occasional oversized tree. Finally, factor in wear-part cost, replacement frequency, and expected service life before you compare purchase prices.
TGEC offers both fixed-tooth drum mulchers for high-volume surface clearing and disc mulchers for standing-tree forestry applications. View the complete excavator mulchers lineup or send your excavator make, model, and hydraulic specs to the TGEC team for a tailored recommendation.